Pink Paislee - "Queen Bee"


Instructions for creating the Lily included in the April Monthly Kit:
Additional suppies needed:
- Glue
- A soft padded surface such as a mousemat to work on
- Tweezers
- A material to shade the petals such as markers or Twinkling H20's & a Waterbrush
 The kit contains 6 petals each of 4 different sizes. Seperate the Petals into the four different sizes. Take one size to create your Lily.
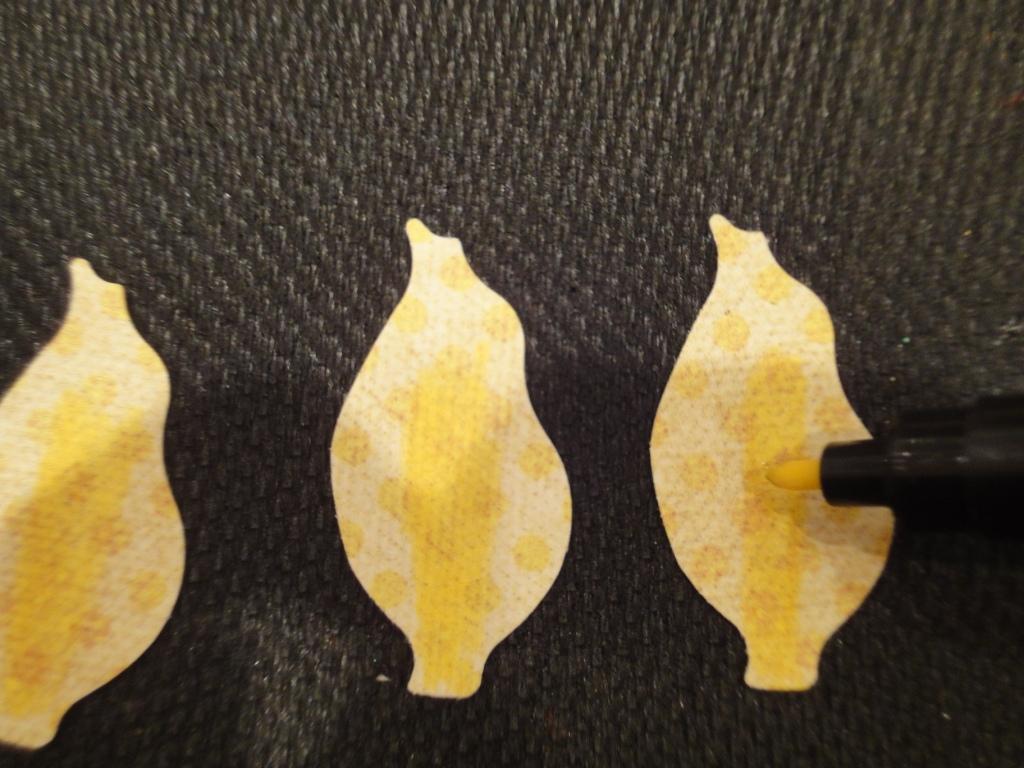
Using a marker, such a a Pro-Marker or Copic Ciao or a Waterbrush and Twinking H20's, add shading down the center of the 6 petals.

With a darker marker 'dot' over the shading.

Using the flat end of the tweezers shape the 6 petals by applying pressure & running the tweezers down the length.


Take each petal by the tip and dip each end into glue. Place 3 petals around each other projection of the green snowflake shape. Repeat with the other 3 petals placing them closer to the centre.


Take the stamen piece and colour circles on the ends on both sides.

Dab a small amount of glue in the middle and press the stamen together. Then dip the end into the glue and place it in the center of the flower.
 Allow to dry completely (Approx 30 minutes)
Allow to dry completely (Approx 30 minutes)
That's such great idea!! Which punch is that?
ReplyDeleteTFS!!!
Hi Sonia,
ReplyDeleteIts these punches:
http://www.thecraftzboutique.com/catalog/mega-theme-punch-lily-petals-p-18028.html
http://www.thecraftzboutique.com/catalog/medium-punch-crystal-flake-p-18017.html
http://www.thecraftzboutique.com/catalog/large-punch-flake-p-18020.html
(But for the middle punch it doesn't show so you could use anything such as a circle of cardstock)